My daughter loves her books and reading them, she has done ever since she was little. She loves to collect books and has been collecting the Clothbound Penguin Classics.
So we thought we would have a go at trying to create our version of a clothbound book, by recovering a softback-covered version of Mary Shelley’s Frankenstein. My daughter picked up this copy from a charity shop

Removing the cover
The outer cover was removed from the text block carefully so that the spine wasn’t damaged because we needed the main block of the book to be intact.


Endpapers and Spine
Once the cover was removed it was time to add the endpapers and strengthen the spine.
My daughter wanted to cover the book with a black cloth which she found at Shepherds store, and while there she managed to find some hand-printed black and white marbled paper which was used for the endpapers.


The spine had a fresh layer of glue added to it, then mull was applied, and then finally a backing layer to add strength.

The new cover
A new hardcover was made for this book and was then covered using the black material my daughter had purchased from Shepherds.
You can see from the images below the cover my daughter made. But for some reason, I missed taking a photo of the cover once it was covered in the material.


Creating the “Classic cover”
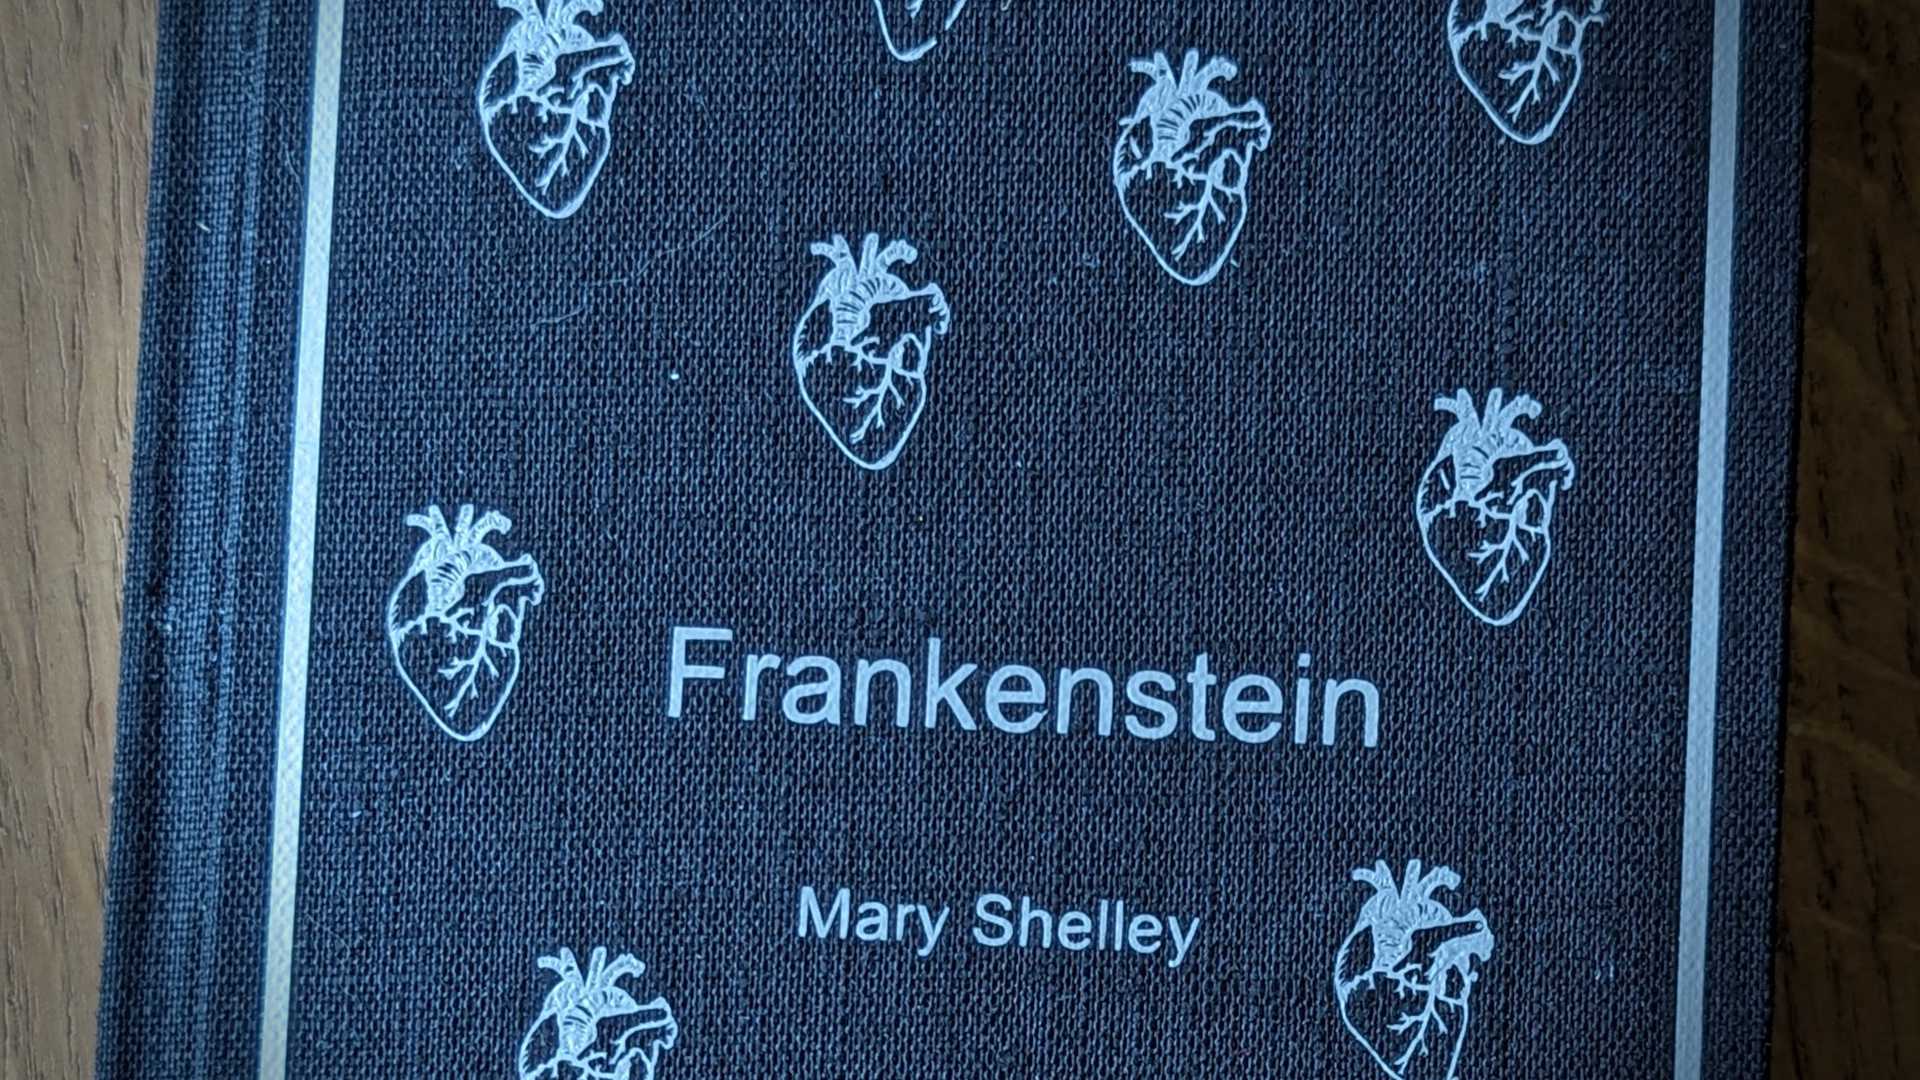
As mentioned right at the beginning, my daughter loves the clothbound classics, and so we wanted to create something in that same style.
To get a similar effect we used Cricut’s iron on foil. I used my Silhouette Cameo to cut the design out I put together in Silhouette Studio. I had to remember to mirror the design before cutting.


Once the design had been cut, I needed to weed it by removing the foil so it only left the design we needed for the book.


I then cut the front, back and spine to shape and tested them for size and they fit perfectly.


Once I knew they would fit on the cover, I used my Cricut EasyPress to press the foil and apply it to the book cover, and I did each section (front, back and spine) separately.
You can use an iron to apply the foil, which I’ve done in the past but the EasyPress applies a nice equal amount of heat across the entire section and you can also control the temperature depending on the material and vinyl/foils you are using. With the press, you can also set a timer so you get the precise amount of heat.


Once the foil had cooled down to the touch, I removed the plastic gently by peeling it at 180 degrees where it came off nicely.


I put the cover back in my nipping press because the heat from the EasyPress had caused it to warp slightly. I left it overnight and by the morning it was nice and flat again.
I then glued the text block to the cover, and left this to dry in the press overnight again, and here is the finished piece…


We’re so happy with the result! We have plans to do other books, for example, I have a copy of JRR Tolkien’s “The Hobbit”, and it sounds like my daughter has plenty of other books to recover.


