A short time ago we had a clear out of cupboards and drawers when I was swapping out my desk, and I found what looked to me like photo album paper a little larger than A4 size in width, there were at least a couple hundred pages. We were given this paper to use as scrap paper which belonged to my late father-in-law.
The paper
It had sat in the bottom of the cupboard for a couple of years when we found it. We thought we weren’t going to use it, so it was close to being recycled or given to charity. But yet it was such nice paper to give away, and that’s when my wife mentioned she would use the paper in a scrapbook if I would make her one.


As you can see above in the images, it is lovely paper and would have been a shame to have given them away. I did need to trim the edge on the spine of the paper because it had several holes pre-punched into them for binding, so I used my guillotine to do this job for me…and one swift cut of the blade and they were gone.
Making the text block
Because the paper was loose sheets and I wanted to make a hardback book, it meant I wouldn’t be able to create a standard case binding with stitching. So I decided to go for a “perfect binding”, which is a glued spine.

I initially thought the paper was A4, so I used A3 paper for the endpapers. But this is where I realised this scrap paper was a few centimetres wider.
I couldn’t trim the fore-edge of the text block because the paper had rounded corners, and the margins for the head, tail and fore-edge were the same so that would have made it look uneven. The only place I could trim was the spine…yes the spine I had already glued! 🫣 It worked out OK because the margin is larger, so I could afford to take enough off so that the endpapers would fit.
Once the endpapers were added I glued mull to the spine to help strengthen it. Because the scrap paper had rounded corners on the fore-edge I had to use a sharp blade to cut them into the endpapers. My heavy-duty corner cutter wasn’t the same size so I couldn’t use this and didn’t want to chance to mess up the paper.
The cover
My wife had got some Sanderson material which she had spare and wondered if I could use it as a cover for the scrapbook.
Before I could use it I had to back it with thin paper (I’ve used tissue paper) first, which stops the glue from seeping through to the outside when glueing down to the boards.
I have plans to do a post on how I back my material, so keep an eye out for this!
Once the material was backed, it was a case of glueing it down and clamping it a bit, as the material was thick and so it would start to lift away if I wasn’t holding it down. But got there in the end.


Once the cover had dried and was ready, I then lined up the text block and glued it all together. I left it to dry while it was being pressed overnight.


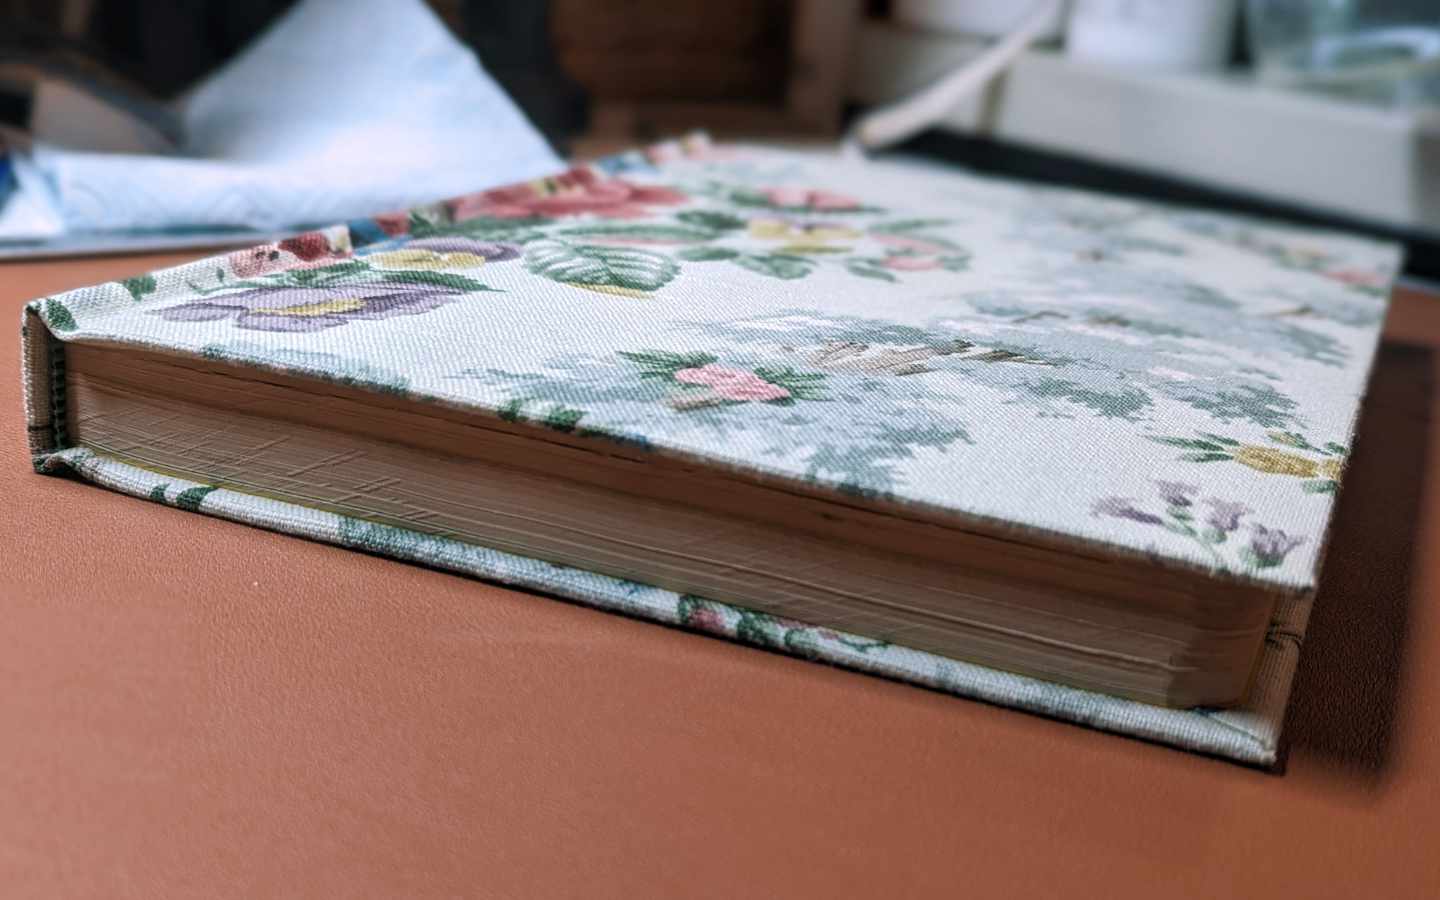
The finished scrapbook
This has to be one of my favourite bookbindings! As you can guess my wife loved it as soon as she saw it. The Sanderson material has worked well as a cover, I did wonder whether it would or not as it is a thick material.


